A contractor's guide to why broom finished colored concrete goes wrong & how to get it right
Posted 3/27/2026
The biggest mistake you can make on a colored broom finish job is treating it like a standard flatwork pour. Gray concrete has a wide margin for error. Colored broom finished concrete does not. Minor issues that disappear on a gray slab show up as visible color failures on integrally colored concrete. Here's what you need to get right to avoid color problems.
Broom finishes don't have release or secondary colors to add contrast like stamped concrete does. What you place is what you see. A light pigment loading that works for stamped slabs may look washed out on a broom finish, especially in full sun. The color has to stand on its own, so go with a heavier loading.
Pro Tip: Solomon Colors' ColorFlo® color card includes four loading levels. For broom finishes, start at 3% minimum. 4% is preferred.
Spraying water onto a tightening slab, sometimes called "blessing" the concrete, is the fastest way to ruin the color. When you add water to make brooming easier it changes the water-cement (w/c) ratio where the color matters most. It dilutes the paste, washing pigment out of the top layer. The result is permanent chalky streaks that look like efflorescence but aren't. You can't wash them off.
If the slab is tightening faster than you can work it, use DAY1® Finishing Aid. It lubricates the surface and extends working time without changing the w/c ratio or affecting the integral color. On a moderate day, it's insurance. On a hot, dry, or windy day, it can save the slab. Keep it on hand for every colored pour.
Did You Know? DAY1® helps reduce the risk of efflorescence on both colored and non-colored mixes. On a colored broom finish job, that's one less thing to worry about.

Broom too early and you'll pull sand and cement fines out, weakening the surface and creating a shaggy texture that traps dirt and highlights color variation. Broom too late and you won't get the slip resistance the spec calls for.
Pro Tip: Use the finger test. Press your finger into the slab edge. If it sinks more than a quarter inch, wait. When you can leave a clean, firm impression without sinking, you're in the window.
"A lot of guys will just dunk their broom in a wheelbarrow full of water and go straight to it. On gray concrete, it doesn't matter. On colored work, it does."
— Josh Cunningham, Brickform Training Team
A damp broom works best and will slide smoothly across the surface. A wet broom, on the other hand, can wreak havoc on the color. Keep the moisture in your broom consistent. If one pass is dry and the next is carrying extra water, you'll see it in the color. Even a single drop can leave a noticeable light spot. Rinse and thoroughly shake out your broom before every pass.
Watch for buildup on the bristles. When chunks of paste and cream build up and fall off mid-pass, they leave behind debris, or "boogers," that interrupt the texture. On colored concrete, those imperfections stand out even more. Agitate the bristles with a gloved hand or rinse them frequently to keep them clean.
The depth of the broom groove controls how light reflects off the surface. Inconsistent groove depth creates inconsistent shadowing, which the eye reads as blotchy or patchy color, even when the mix is uniform.
Have multiple broom stiffnesses on hand. Or consider an interchangeable bristle system that lets you swap bristles as needed. If one section of the slab is in the sun and setting faster than the shaded side, switch to a stiffer bristle to maintain consistent groove depth across the pour.
For wide pours, consider handleless rope brushes. The weight of a long handle can push a standard broom too deep into the surface, creating uneven texture. Rope brushes eliminate that downward pressure and help keep groove depth consistent.
Broom strokes must be straight, continuous, and overlapping from edge to edge. Changing direction creates intersecting ridges that catch light at different angles. This makes a uniform mix look multi-toned. Never stop the broom mid-slab. Starting and stopping creates breaks in the texture that show up as color variation.
Keep one finisher on the broom for the entire pour. Every person has a different hand, a different natural downward pressure. If you switch mid-job, you'll see a difference where the pressure changes.
Going back over one area for a second pass deepens the groove on that section. If the rest of the slab only got one pass, that section will catch light differently and read as a color shift. If you're unhappy with how something looks, your best option is a consistent second pass across the entire slab, not just the problem area.
"You can't just touch up that one spot. Everywhere you put the broom down and pick it back up, it's going to make that break. You're going to have to go back and broom the whole strip again."
— Josh Cunningham

While brooming gets the most attention, many color issues start before the broom touches the slab. Here are a few other things to have locked in before the trucks arrive.
Calcium chloride. Never use it as an accelerator on colored work. It reacts with iron oxide pigments and causes mottling, permanent dark blotchy patches across the slab. Use a non-chloride accelerator.
Slump consistency. Water dilutes pigment. A one-inch slump difference between trucks produces a visible color seam. Lock in your target slump and hold it across every truck. If you need more flow, use a superplasticizer, not the hose.
Fiber. If fiber is in the spec, use UltraFiber 500® (UF500) at 1.5 lbs per cubic yard. It's a cellulose microfiber that accepts integral color and is invisible in the finished slab. Polypropylene fiber won't accept color, leaves surface fuzz, and requires torching before you can seal. It has no place on colored broom finish work.
Plastic sheeting. Never cover colored concrete with plastic. Trapped condensation drips back onto the surface and causes permanent dark splotches. Use a proper curing method.
Sealing. Once the slab is fully cured, seal it with a penetrating sealer that won't alter the texture or add gloss. Brickform Stealth-Seal WB is a water-based silane/siloxane blend that bonds with the cement paste rather than forming a surface film. It protects against freeze-thaw, salt, and water intrusion while keeping the natural broom finish intact. Never seal over dark spots or uneven moisture. Sealing over trapped moisture locks the discoloration in for good.
"The number one do for colored concrete should be get a good weather app. Don't pour before or after it's going to rain."
— Josh Cunningham
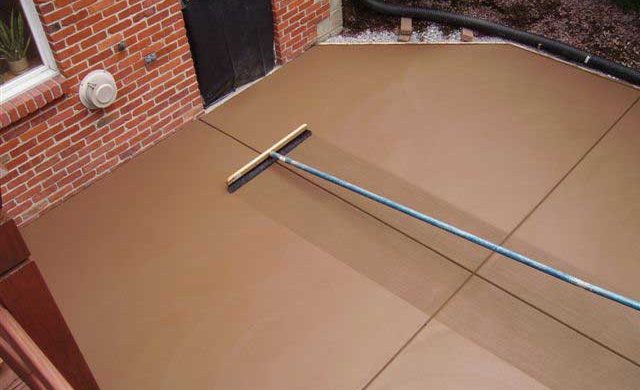
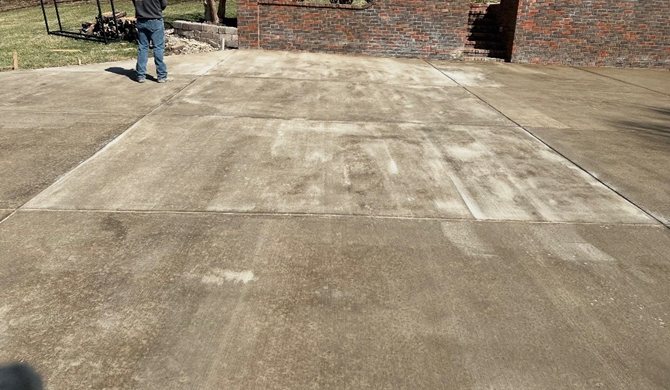
Weather. Weather has a big impact on how colored concrete turns out. Heat, wind, and uneven sunlight can cause a slab to cure at different rates, leading to blotchy color. Some of these inconsistencies may even out with time, but there are no guarantees. On top of that, unexpected rain adds extra surface water. This dilutes the pigment and increases the risk of efflorescence, a white residue that hides the true color.
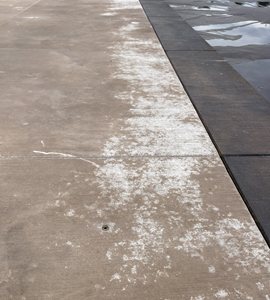
Rain moved in within a few hours of pouring and finishing this colored and broomed pool deck. The result is efflorescence across much of the surface. The finish was good. The timing wasn't.
Check the 48-hour forecast before the trucks are ordered. If you can't reschedule and rain is likely, have a protection plan in place, but remember, no plastic sheeting.
A broom finish is not a forgiving texture when integral color is involved. Get the mix right, manage your broom the way you'd manage any precision tool, and protect the finished slab with a sealer built for colored flatwork.
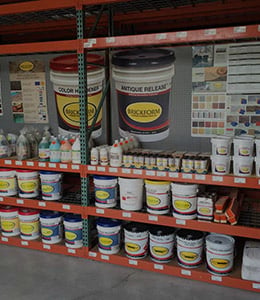
For product specifications on ColorFlo® SG Granular, UltraFiber 500®, DAY1® Finishing Aid, and Brickform Stealth-Seal WB, contact sales or your local distributor.
Learn why sealing colored concrete is crucial and get info on the right products to use for the best results.
Get tips for correcting color issues with a tinted sealer or using it to add color to gray concrete.
Everything you need to know about adding color to concrete—from selection to installation and maintenance.
Explore impressive concrete installations to find inspiration for your next project.
Find out how much color and fiber you'll need for any size project.